My office gets pretty cold and I had worried that the heater would come on if it went below 5°C. This was until I went in there and discovered that the thermostat from Honeywell will not read lower than 5°C!
Now I have grafana I was wondering how to get a reading of the temperature in there. I have lot of kit kicking around from my arduino days so I thought I would give it a whirl. The aim was for the arduino to push the current temperature to the mosquitto broker on openhabian then read it out to influxdb and eventually to grafana.
I ended up using:
- arduino uno
- arduino uno ethernet shield
- DS18B20 temperature sensor
- 4.7 kΩ resistor
- breadboard and leads
Recipe
I used this to remind me how to get the temperature sensor working: https://create.arduino.cc/projecthub/TheGadgetBoy/ds18b20-digital-temperature-sensor-and-arduino-9cc806. Then with a bit of searching and playing around I got the whole kaboodle working. There was a lot of intelligent copy and paste and I have no idea how much of this is redundant but it bloody works (code below).
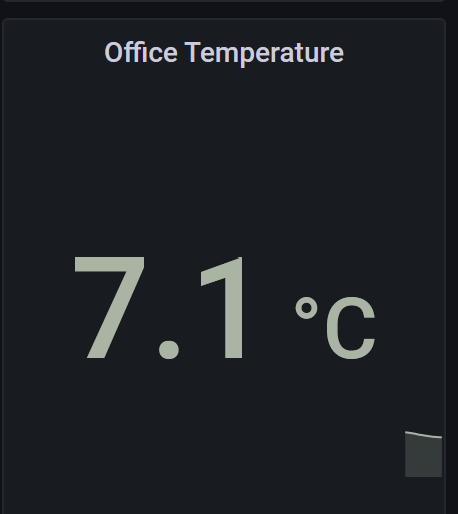
Weirdly, the graph sparklines did not work in the temperature display in grafana. https://community.grafana.com/t/sparkline-does-not-appear-on-single-stat-graph/566 helped me work out that I needed to do a GROUPBY in the query (I used 15m). You can see the result at the top of the page.
/********************************************************************/
// First we include the libraries
// Temp Sensor
#include <OneWire.h>
#include <DallasTemperature.h>
// Ethernet Shield
#include <SPI.h>
#include <Ethernet.h>
// Mqtt
#include <ArduinoMqttClient.h>
/********************************************************************/
// Data wire is plugged into pin 2 on the Arduino
#define ONE_WIRE_BUS 2
/********************************************************************/
// Setup a oneWire instance to communicate with any OneWire devices
// (not just Maxim/Dallas temperature ICs)
OneWire oneWire(ONE_WIRE_BUS);
/********************************************************************/
// Pass our oneWire reference to Dallas Temperature.
DallasTemperature sensors(&oneWire);
/********************************************************************/

// Enter a MAC address for your controller below.
// Newer Ethernet shields have a MAC address printed on a sticker on the shield
byte mac[] = { 0xDE, 0xAD, 0xBE, 0xEF, 0xFE, 0xED };

// Set the static IP address to use if the DHCP fails to assign
IPAddress ip(192, 168, 0, 23);
IPAddress myDns(192, 168, 0, 1);

EthernetClient net;

MqttClient mqttClient(net);

const char broker[] = "openhabian";
int        port     = 1883;
const char topic[]  = "arduino/temperature/";

char clientId[] = "ToM_arduino_001";
char username[] = "openhabian";
char password[] = "averybigsecret";

const long interval = 1000;
unsigned long previousMillis = 0;


void setup(void)
{
 // start serial port
 Serial.begin(9600);
 Serial.println("Dallas Temperature IC Control Library Demo");
 // Start up the library
 sensors.begin();
  // start the Ethernet connection:
  Serial.println("Initialize Ethernet with DHCP:");
  if (Ethernet.begin(mac) == 0) {
    Serial.println("Failed to configure Ethernet using DHCP");
    // Check for Ethernet hardware present
    if (Ethernet.hardwareStatus() == EthernetNoHardware) {
      Serial.println("Ethernet shield was not found.  Sorry, can't run without hardware. :(");
      while (true) {
        delay(1); // do nothing, no point running without Ethernet hardware
      }
    }
    if (Ethernet.linkStatus() == LinkOFF) {
      Serial.println("Ethernet cable is not connected.");
    }
    // try to configure using IP address instead of DHCP:
    Ethernet.begin(mac, ip, myDns);
  } else {
    Serial.print("  DHCP assigned IP ");
    Serial.println(Ethernet.localIP());
  }
  // give the Ethernet shield a second to initialize:
  delay(1000);

  Serial.println("You're connected to the network");
  Serial.println();

  // You can provide a unique client ID, if not set the library uses Arduino-millis()
  // Each client must have a unique client ID
  mqttClient.setId(clientId);

  // You can provide a username and password for authentication
  mqttClient.setUsernamePassword(username, password);

  Serial.print("Attempting to connect to the MQTT broker: ");
  Serial.println(broker);

  if (!mqttClient.connect(broker, port)) {
    Serial.print("MQTT connection failed! Error code = ");
    Serial.println(mqttClient.connectError());

    while (1);
  }

  Serial.println("You're connected to the MQTT broker!");
  Serial.println();
}
void loop(void)
{
 // call sensors.requestTemperatures() to issue a global temperature
 // request to all devices on the bus
/********************************************************************/
 Serial.print(" Requesting temperatures...");
 sensors.requestTemperatures(); // Send the command to get temperature readings
 Serial.println("DONE");
/********************************************************************/
 Serial.print("Temperature is: ");
 Serial.print(sensors.getTempCByIndex(0)); // Why "byIndex"?
   // You can have more than one DS18B20 on the same bus.
   // 0 refers to the first IC on the wire
   delay(10000);
   // call poll() regularly to allow the library to send MQTT keep alives which
  // avoids being disconnected by the broker
  mqttClient.poll();

  // to avoid having delays in loop, we'll use the strategy from BlinkWithoutDelay
  // see: File -> Examples -> 02.Digital -> BlinkWithoutDelay for more info
  unsigned long currentMillis = millis();

  if (currentMillis - previousMillis >= interval) {
    // save the last time a message was sent
    previousMillis = currentMillis;

    Serial.print("Sending message to topic: ");
    Serial.println(topic);


    // send message, the Print interface can be used to set the message contents
    mqttClient.beginMessage(topic);
    mqttClient.print(sensors.getTempCByIndex(0));
    mqttClient.endMessage();

    Serial.println();

  }
} 